
If you can relate, then dropshipping is the best solution for you. This business model works wonders for eliminating all the typical headaches that come with running an online store. With a dropshipping business, you can completely forget about all the typical hassles associated with setting up an online store. Instead, all you need is an attractive website, and the right Shopify app, and you can inexpensively send products to customers all around the world.
So, now we've (hopefully) piqued your interest, let's take a look at our step by step guide on how to dropship on Shopify…
Before we start, here's our summary of the top 5 Shopify dropshipping companies out there:
| Dropshipping company | Pricing | Editor's rating |
|---|---|---|
|
⭐⭐⭐
|
|
|
⭐⭐⭐ | |
|
⭐⭐⭐ | |
|
⭐⭐ | |
| Free – 5% transaction fee for up to 25 products
$35 / Month – 5% transaction fee for up to 25 products $90 / Month – 5% transaction fee, unlimited products |
⭐⭐ |
Shopify Dropshipping – Table of Contents:
- What is Dropshipping?
- What is Shopify Dropshipping? How does Shopify Dropshipping Work?
- How to Start Dropshipping with Shopify?
- Are You Ready to Start Dropshipping with Shopify?
- Making the Most of Dropshipping on Shopify
What is Dropshipping?
First things first, we need to clarify what dropshipping actually is. We briefly hinted in the intro, but for those reading who are unfamiliar with the practice, this is what dropshipping involves.
Obviously, you need an online store up and running. But, once you eventually make that first all-important sale, dropshipping takes all the stress of fulfilling an eCommerce business order off your hands. In other words, you don’t need to buy, stock, and send the product to a customer. Someone else handles all of the hard work for you.
Instead of you having to handle the product order, the customer request is sent to a third party (i.e., your supplier). They then ship and deliver it directly to your customer.
This means you don't even have to touch the product, AND you only pay for what you sell — win-win! With dropshipping, there are no enormous upfront costs that typically come with purchasing and storing masses of inventory to sell. Sometimes your products will come from a well-known location like Alibaba, and sometimes they’ll be from locations that are a little closer to home.
Choosing the right dropshipping supplier is the key to not only delivering the kind of quality that your customers deserve, but making sure that you have the right selection of products too. Additionally, choosing a good dropshipping supplier also means that you don’t have to worry about angry customers complaining that they haven’t received their products quickly enough. You can make sure that you choose suppliers that can deliver quick shipping times.

What is Shopify Dropshipping? How does Shopify Dropshipping Work?
If you've done any research into dropshipping, you'll probably have come across the ecommerce giant that is Shopify. This solution is one of the most popular platforms for merchants.
Why?
Namely, because it's:
Drop shipper-friendly: It seamlessly integrates with tons of dropshipping services, including Oberlo, Printful, Spocket, Dropified, — just to name a few (But, more on these in a bit):
You can register multiple users: If you have a team, never fear. Shopify supports numerous users for one account. So, rest assured, your staff can help with all your dropshipping ventures!
Brimming with easy-to-use tools and features: In addition to its online store builder, Shopify also has tons of features for helping you manage your sales, marketing tasks, and customer payments. This is one of Shopify's many aspects that make it ideal for newbie e-commerce merchants.
Boasts an intuitive interface: You only have to read a couple of Shopify reviews to get a sense of how user-friendly this solution is. Despite its vast array of features, Shopify isn't a daunting piece of software to use. In fact, it does an excellent job of explaining how to make the most out of the platform to new users.

With a Shopify dropshipping store, you can quickly, easily, and affordably get all of the tools that you need to start sending products to customers around the world. It’s even easier than setting a store up on eBay because you don’t have to store any of your own ecommerce business products.
All you need to get started is a website, an idea of what you want to sell, and a solution from the Shopify App Store, like Oberlo. From there, you can start connecting with merchants who will do all of the hard work of serving your customers on your behalf.
Let’s take a closer look at how all of this actually works.
How to Start Dropshipping with Shopify?
That's enough of the preliminary stuff. Now, it's time to explain how to dropship with Shopify step by step. So, let's dive in!
The dropshipping business model is heavily supported by Shopify. That’s because apps on the Shopify App Store help you to connect with merchants that can fulfil your orders on your behalf. There are other ecommerce website builders that will allow you to build an online store and start dropshipping. However, most people agree that dropshipping with Shopify is easiest.
Step 1. Create a Shopify Account
If you haven't already, you need to set up an account with Shopify. Never fear, this is super simple. Just head over to their website and click the “Get Started” button.
💡 Top Tip: When you do this, try to have a name in mind for your online store, as this is one of the first things they ask for.
Shopify will then ask questions about the following:
- Whether you’re already selling a product(s)
- Your physical address
- Other basic info
Once completed, you’re automatically redirected to your store’s backend. Here’s where you can explore the various free themes and premium themes that Shopify has to offer. Before you begin selling your dropshipping products, we would recommend taking the time to really edit your website and make it into something special.
The right theme and an easy to navigate homepage can make it a lot easier to capture the attention of your target audience and build a more successful company overall. What’s more, when you personalize your website with the right ecommerce platform, you can build a reliable brand personality for your company, which keeps your customers coming back for more.
Remember, you can either use Shopify themes that are baked into the free and premium options on the backend, or you can pay for a professional to make you the best Shopify design from scratch.

Step 2. Add Products
Now you're in the backend of your Shopify store, there are several things you can do, including:
- Choosing the theme (AKA design template) for your store
- Setting up your web domain name
- Adding products
Just to name a few.
Our advice? Once you have a Shopify account, start adding products to your store. This makes designing your online shop so much more straightforward. Namely, because you don't have to imagine what your online shop looks like with products — they're already there!
So, how do you go about sourcing and adding products to your store?
The simplest solution is to use one of the many Shopify dropshipping apps we'll explore later in this article. But for now, let's just assume you've already uploaded a product to sell on your Shopify store.
Once you've edited the title, product description, and photos, you'll need to assign the item a product tag. These ‘tags' are essential for helping organize your product catalog. For instance, if you're selling pet products, you might use any of the following examples as ‘tags': grooming products, pet food, dog beds, and so on, and so forth.
There are a couple of ways you can add product tags. Firstly, you could set tags for each individual product. Alternatively, you can add tags in bulk to items on your product list. To do this, select the merchandise you want to tag, then select the “Actions” dropdown menu, followed by “Add tags.”
Once you've added the necessary tags to your products, you can move onto creating ‘product collections.' These are best described as ‘product groups' that make it easier for customers to find what they're looking for. For instance:
- Items on sale
- Product size
- Product color
To create a product collection, look to the left-hand navigation menu, and select “Products.” Then select “Create Collection,” this automatically directs you to a page where you can create a name and description for the product grouping.
You can set two types of collections:
- Manual
- Automatic
Manual collections only include products explicitly chosen by you (or your staff). As you can imagine, this type of collection takes more time and energy to maintain. As such, these are usually more suitable for smaller product catalogs.
Whereas automated collections work by you (or your team) setting a variety of conditions that automatically match products to the appropriate ‘product collection.'
For instance, if you're hosting a 50% off sale, you could set an automatic collection to include all products with a “sale” tag. Simple, right?
How to Dropship on Shopify with Oberlo?
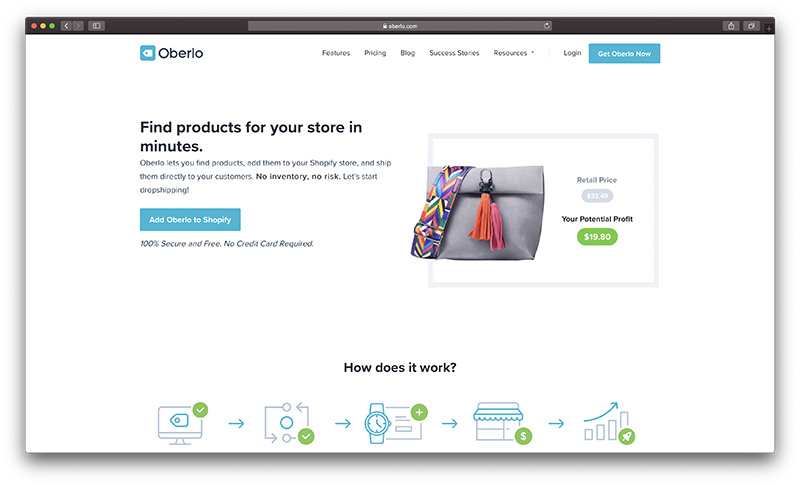
Oberlo is a Shopify-owned dropshipping app. So, it's a robust first port of call for anyone new to dropshipping. The integration is seamless, and the process of adding, listing, and selling products is effortless.
To use Oberlo, head over to the “Products” menu located on Shopify‘s backend. Then select ‘More actions,' followed by: “Find more products to sell.” This should take you to the Oberlo app. Here you can search for products and suppliers using the search bar. Scroll through the results at your leisure and click on the goodies you want to sell by hitting the ‘select product' button.
This will bring you to a product page where you’ll see:
- The supply cost
- The shipping cost
- A pricing field (where you enter your retail price)
If you're happy with the item, go ahead, and click “Add product.” Then, Oberlo adds it to your Shopify store for you.
You can import, list, and sell hundreds of products directly from your Shopify store.
Then, when you do eventually make a sale, Oberlo handles every aspect of the order fulfillment process. You'll also receive automatic updates concerning the quantities and pricing of Oberlo's products, so you'll never be caught short!
There's also plenty of product customization features, which makes editing product names, descriptions, and images a breeze.
Not to mention, Oberlo also comes with an automatic pricing feature. So, if you want to set pricing rules for your merchandise and handle the price of your products in bulk, this comes in handy. You're also provided with shipment tracking info, which allows you and your customers to keep an eye on deliveries at all times.
How Much Does Oberlo Cost?
It's free for entrepreneurs only uploading 500 (or fewer) of Oberlo's products and receiving 50 (or less) orders a month.
But, if you want to exceed that, Oberlo will set you back:
- $29.99 a month to import 10,000 products and process 500 monthly orders
- $79.90 a month to import 30,000 orders. But, you can handle an unlimited number of orders each month.

How to Dropship on Shopify with Printful?

Printful is best for entrepreneurs using (or considering) the print-on-demand business model. In laypersons speak, this is where you have a third-party company print your designs and artwork onto things like t-shirts, mugs, posters, etc.
With Printful, you'll be glad to hear; you don't have to pay any monthly fees or inventory costs. Printful also boasts a seamless integration with Shopify. This is what permits Shopify to send your customer orders directly to Printful for fulfillment.
Plus, Printful owns its own warehouses and fulfillment facilities, which is partially what makes them so reliable when it comes to storing, shipping, and delivering products. One of the other things we love about Printful is that you can easily create mockups using their mockup generator and photos.
For more details on Printful's costs, you'll need to visit their website. Prices vary depending on the products you want to print on.
How to Dropship on Shopify with Spocket?
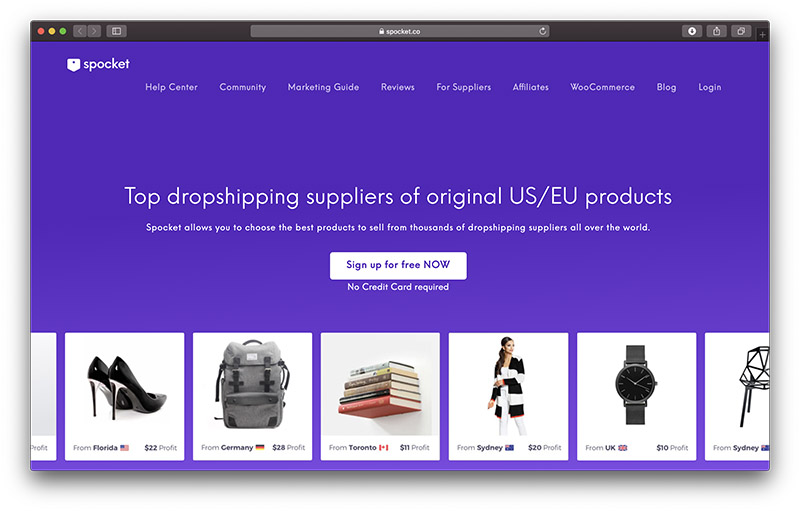
If you want to dropship products from across the globe, namely from countries and states from the US, Europe, Asia, and Africa, then Spocket is the company to go for. Not only does Spocket come in handy for reaching an international audience, but it also prices its products (of which, there's over a million to choose from) so you can enjoy higher profit margins! Spocket boasts deep discounts on all of its products, anywhere between 30% and 60%!
Once you place an order, your customers will receive their goodies within (approximately) five to seven working days, and local orders are even quicker at two to five days. You can also customize invoices with your logo and business colors, which works wonders for strengthing your brand.
It's also worth mentioning, the order fulfillment process is incredibly simple, with just a simple click you can submit your customer's requests to your Spocket suppliers. You'll also benefit from real-time stock level updates…so you'll never accidentally sell goods you've run out of.
Best of all, Spocket is free to get started with!

How to Dropship on Shopify with Dropified?

If you're looking to free up some of your precious time through the power of automation, Dropified is definitely worth considering. On average, Dropified estimates you can save yourself a whopping 20 hours a week using their services. Just think of what you could do with all that extra time!
To make it easier, we've listed some of Dropified's most notable features:
- A top-notch Zapier integration
- Dropified makes it easy to find, select, import, and sell high-quality products from AliExpress
- You can view quick profit statistics from the convenience of Dropified's backend.
- Automated price and availability updates
How to Dropship on Shopify with Modalyst?

Last but not least, there's Modalyst. This is a fabulous dropshipping app specializing in big-name brands, as well as niche artisan products. With over 600 vendors to choose from, you're bound to find something to meet the needs of your customers.
Modalyst provides products from brands as notable as:
- Superga
- Calvin Klein
- Diesel
- DSquared
- Puma
- Lacoste
- Cavalli
- Moschino
- Dolce & Gabanna
Some of Modalyst's key advantages are that:
- They centralize all your suppliers, product management, and order-related tasks from the convenience of one place.
- It's quick and simple to add products from the Modalyst marketplace onto your online store and edit product names and descriptions.
- Continuous and automatic price and inventory updates.
Like some of the other plugins mentioned, Modalyst is also free to use, and some suppliers even offer free shipping!
Step 3. Design Your Online Store
Once you’ve picked, edited, and published all your products, it's time to focus on designing your store. Again, this isn't a difficult task.
You just click the tab, “Online Store,” which is located on the left-hand sidebar of your Shopify dashboard. From here, you can either opt for a free Shopify theme or splash out on one of their paid-for templates.
Assuming you've now picked a theme, head back to your Shopify dashboard, and select “Customize.” This automatically directs you to Shopify's ‘Theme Designer.' From here, you can edit the aesthetic of your store. Just peruse through all the design options listed (again, located on the toolbar towards the left-hand side of your screen), and make whatever edits you desire.
Adding Images
When it comes to publishing images on your Shopify store, we wanted to include a separate section. Namely, because Shopify provides a couple of different ways you can do this, all of which (like virtually everything else with Shopify) is super simple.
You can choose to either upload images directly from your laptop (or whatever device you're using). Or, you can select pictures from Burst. For those who don't know, Burst is Shopify’s free library of stock imagery, designed to make it easy to search for images that best fit your needs.
Once you find a picture you like, you can preview how it looks on your site before it goes live. Never fear, you can do all this from the convenience of Shopify's theme editor, which means there's no need to toggle between hundreds of tabs!

Shopify Themes: The General Settings
Of course, there are other more general settings surrounding your Shopify theme, which you can modify. For instance, you can play around with:
- The layout of web pages
- The color scheme of your site
- The typography
- The social media icons you use and the accounts you link to
- Your checkout page
The beauty of Shopify is that you can keep making tweaks until you're 100% happy with the finished product. Once that eventually occurs, click ‘Save' — and, voila, you're done!

Add Different Web Pages
It's not just product pages that make a store. You've probably noticed that the majority of online shops boast several other ‘staple' web pages, most commonly:
- An ‘about us' page
- A ‘contact us' page
- A page outlining your shipping and returns policies
- An FAQ page/ knowledgebase
To create a new page on Shopify, you'll need to head to your Shopify dashboard. Then select ‘Pages' from the menu on the left-hand side. Now, click “Add Page” to set the title and content.
From here, you'll also be able to:
- Edit the meta title
- Modify the meta description
- Change the URL
Which, for SEO purposes, we suggest doing all those things. But, alas, we don't have time to delve in-depth into this topic here. Then, once you’re happy with everything, click ‘Save.'
Sort Your Website's Navigation
So, now you have your web pages and product collections ready, it's time to figure out your navigation settings. Of course, by ‘navigation settings,' we're talking about the main menus on your website, and which of your web pages and product collections will appear on them.
Before you dive straight in, consider the following questions: What information do your customers want to find? AND What content do YOU want shoppers to find? Use the answers to these questions to fuel your website's navigation.
💡 Top Tip: If you have web pages detailing your returns, refunds, and shipping policies, you might want to link to these pages in the footer of your site. The same goes for your FAQs page.
Once you have an idea of the structure of your website menu(s) follow the steps below:
- Head to your Shopify dashboard
- Select the “Navigation” option located in the left-hand menu
- Select which menu you want to add your link, page, collection, (or whatever else). These are known as ‘items.'
- Then select “Add menu item.”
- You can then input a name for your item.
- In the “Link” field, pick whatever item you want to add (collections, products, links, etc. — you can choose from whatever you’ve already set up. )
Let's take your ‘contact us' page as an example. So, we'll imagine you want to add this to your main menu. In this case, you would have to select “Pages,” then your “Contact Us” page. Get it?
Step 4. Set Your General Preferences
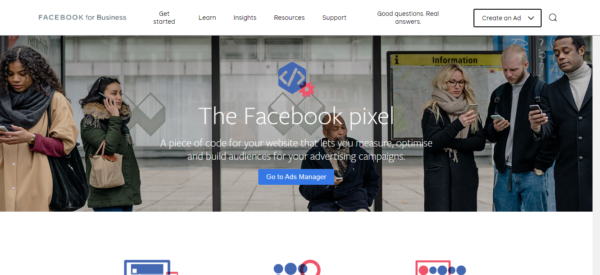
What about your general preferences? Again, from inside your Shopify backend, you can edit the general preferences for your online shop. Just click the ‘Preferences' tab on the left-hand menu. From here, you can write your site's meta title and meta description. It's also where you can insert your Google Analytics code and your Facebook pixel.
Step 5. Setup Your Web Domain
We also suggest adding and using your own web domain name. Without one, your Shopify store’s URL will display this subdomain (as default): https://YOUR-STORE-NAME.myshopify.com/.
I think we can all agree; this doesn't look very professional, which is why using your own domain is so important.
Just like everything we've discussed, adding your domain is also really easy with Shopify.
Just launch Shopify's dashboard, and click on ‘Online Store.' You should see this option in the left-hand menu. From here, you'll see three different ways you can connect your Shopify account with your own domain:
1. Connect with a Third Party Domain
If you already have your own web domain (i.e., one from Bluehost, Namecheap, GoDaddy, etc.), you can use this option to connect with Shopify.
Of course, this process varies between domain providers. So, our best advice is to visit Shopify’s help page for more info on this. Or, speak your domain provider directly.
2. Transfer a Domain to Shopify
If you'd prefer to transfer your web domain to Shopify, you can manage, pay for, and renew your domain via Shopify's backend.
But, always check with Shopify and your web domain provider to ensure you set everything up correctly.
3. Purchase a Brand-New Domain
Don’t have a domain yet? You can buy one through Shopify. Custom domain prices start at $11 per year.
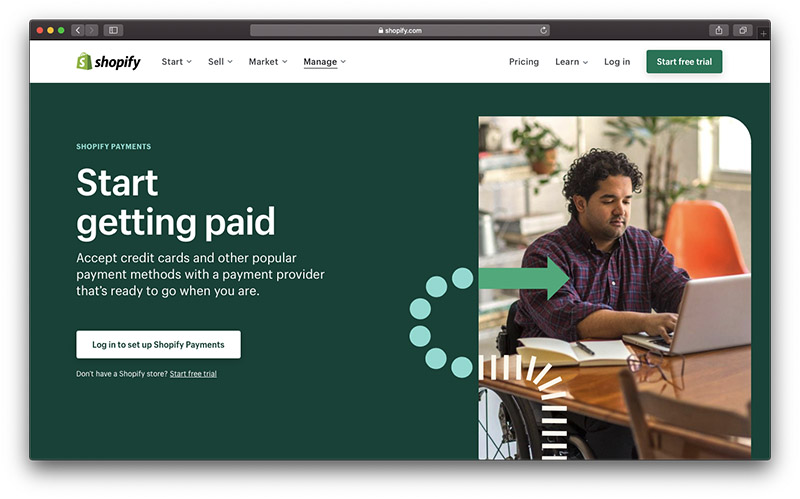
Step 6. Set up Payments
It goes without saying, ensuring customers can successfully pay for their orders is essential. To modify these payment settings, again, head over to the left-hand menu, inside of your Shopify dashboard, and select ‘Settings' and then “Payment Providers.”
This is where you can authorize which payment providers you use. Here are just a few examples of what Shopify has to offer:
- Shopify Payments
- PayPal
- Amazon Pay
- Bitcoin
- Dwolla
You get the idea!
💡 You should note: If you enable Shopify Payments, Shopify can only deposit your funds into your bank account once you've set up your Shopify Payments account.
It's also worth bearing in mind, if you choose to accept payments through PayPal, they'll email you once you’ve made your first sale, with clear instructions on how to set up your PayPal Merchant account.
Okay, so now we've taken a look at how to set up your Shopify store, we're going to circle back to adding products. It's not just Oberlo you can use to dropship products; there are tons of other high-quality plugins. Some of which we've outlined below.
The majority of which, work much the same as Oberlo but boast other unique selling points that may be of greater benefit to your business…
Are You Ready to Start Dropshipping with Shopify?
As you can see from the guidelines above, there are a lot of easy ways to start working with dropshipping suppliers on Shopify. You don’t need to be an ecommerce expert to start with this strategy, because experts from Alibaba and other companies can do all of your order fulfilment work on your behalf.
When you use the dropshipping model to build cash and earn the attention of your customers, you can really speed up the process of building a great brand online. You can still take credit card or PayPal payments according to your own needs, and set your own price points. The main difference is that someone else handles the process of sending orders to your customers instead of you.
When you don’t have to deal with things like shipping times and order fulfilment on your own, you have more time to focus on building your website in different ways. For instance, you could experiment with pop-ups to make sure that people stay on your website for longer, or offer different deals to segmented customers through email marketing.
Having someone else to handle shipping times and orders on your behalf also means that you have more time to keep track of things like organic rankings and making sure that your website appears on the search engine results for your chosen keywords. Basically, a dropshipping supplier takes a chunk of the stress off your shoulders when you’re running an online business, so you can concentrate on the things that you do best.
Making the Most of Dropshipping on Shopify
Of course, the most important thing to remember when you’re thinking about dropshipping with Shopify, is that although it can be very easy to choose this route, there are still steps that you need to put in place. You need to think about how you’re going to find the right dropship supplier with the correct Shopify plugin.
Additionally, consider how you’re going to run your store. Are you going to introduce new products regularly whenever your dropshipping supplier updates their wares? Or do you want to focus specifically on a few key items to keep the complication levels low for your store. Maybe you want to concentrate on shipping only the items that dropshipping suppliers can store and ship from the United States.
While there are options to send your customers products from all around the globe, the shipping times can suffer depending on how far away your supplier is. For a small business, shipping times can make a huge difference to your success story.
Remember that no matter which route you take, or which Shopify App you use to develop your dropshipping business, it’s up to you to develop the right business name for yourself. You need to consider everything from customer support, to how you’re going to make your website stand out. The dropshipping company only does the shipping for you.
Eventually, you may even decide that you want to add some of your own products into the mix, and start combining a traditional store model with the dropshipping method.
We hope having read this article; you feel more prepared to start dropshipping with Shopify. If you have any questions, post them in the comments box below. We want to help our readers as much as we can with their entrepreneurial journeys, so we welcome any and all queries. Speak soon!


Reading this made me wanna give it a chance with dropshipping so i am going to try it and see how it goes …
Good luck Amone!
This is great information. What about having your dropshipping company registered in your country before hand though? Does shopify ask for tax codes etc during the set up process? Wouldn’t I need to register as a sole trader before? Wouldn’t it be illegal otherwise? Thank you!
The information was really, really helpful to me
Happy to hear that Frank!
Glad to read this.
Glad you liked it Kamal!