
Although the platform has removed the need to hire a developer to build your store, selling on Shopify still demands a learning curve. No need for any coding experience to set up a store on the platform. But you need a guide to make it happen anyway. So, here’s your ultimate guide on how to sell on Shopify.
How to Sell on Shopify: Table of Contents
- Introduction to Shopify
- Dropshipping with Shopify
- Shopify Pricing
- Step-by-Step Guide: How to Sell on Shopify
- Summary
Introduction to Shopify
Successful dropshippers know it. Shopify is the ultimate ecommerce platform for a successful dropshipping business. However, most newcomers don’t know that tools like Oberlo and Printful are the engines that drive those desirable results.
On the 2019 Black Friday weekend alone, Shopify sellers recorded a whopping $2.9 billion in sales. Up from its $1.8 billion in 2018.
Shopify supports more than a million businesses from 175 countries. Businesses use the platform to manage their ecommerce websites, marketing, sales, and related operations. In addition to supporting businesses with their ecommerce needs, Shopify provides solutions for offline, brick-and-mortar operations.
Here are parts of the Shopify platform you want to be familiar with:
- Point of Sale (POS): Shopify POS lets businesses process their customers’ payment online or in person. Restaurants and other offline operations will find this service helpful.
- Payments: Shopify Payments makes it easy for Shopify users to collect payments from their customers by credit card and other payment channels like Apple Pay, Google Pay, and allows integration with POS apps from Shopify and other vendors.
- Shipping: Merchants can calculate their shipping rates with Shopify Shipping. This service also covers other shipping needs like insurance, labeling, and tracking.
- Theme: Sellers can customize their shops using website themes from the Shopify Theme Store. This service includes free and paid themes for any number of products a merchant sells.
- Apps: Sellers can integrate more features into their stores without needing to hire developers, thanks to the Shopify App Store. They can choose different apps from multiple categories, including marketing, sales and promotions, social media, reporting, and more.
In this guide, you’ll learn how to use each of these Shopify features to build profitable ecommerce and dropshipping business.
Let’s get started.
Dropshipping with Shopify
One of the most significant benefits of selling on Shopify is that you can start your dropshipping business with little or no friction. The Shopify platform is highly optimized for dropshippers, and you can practically sell any product on the platform.
Although Shopify simplifies your dropshipping journey, it doesn’t take away the hard work. So you have two options.
Option one: you’ll learn the ropes and do everything yourself.
- You’ll find a product to sell,
- Negotiate with manufacturers,
- Manage inventory if necessary,
- Coordinate shipping,
- Take care of packaging, and
- Handle your order fulfillment.
This path may be practical for you if you have all the resources and a team to help you with your business.
However, for most people who are just starting, these steps can be overwhelming and tough to follow.
That’s where option two comes in—use established dropshipping platforms like Oberlo and Printful. Relying on platforms like Oberlo and Printful can mean the difference between success and failure.
Oberlo can help you with everything:
- Find the product to sell
- Manage inventory and warehousing,
- Packaging,
- Delivery
Specifically, you’ll find Oberlo a great fit if you plan on selling products in one or multiple categories.

👉 Check out our Oberlo Review to learn more.
However, if you run or plan to sell t-shirts, mugs, throw pillows, hoodies, jackets, and other printed items, you may want to use Printful. Printful will customize those items with your brand and ship to your buyers when they order from you.

👉 Check out our Printful Review to learn more.
One of the beauties of a dropshipping business model is that you can focus on marketing and business growth and let your product side of the business take care of itself.
Luckily you have more than enough ecommerce marketing tactics to help you drive sales. Dropshipping on Shopify with platforms like Oberlo or Printful lets you focus on implementing these marketing ideas instead of having to do too many things at once.
Shopify Pricing
If you want to try Shopify, but haven’t decided what plan to go for, you can start the 14-day free trial. Clicking on the “Start free trial” button on the top bar on the Shopify website leads you to the form below. All you have to do is fill it and create your store.

However, if you’re ready, you can choose from any of the five price plans.
- Shopify Lite – starts at $9 per month and lets you sell on your existing website or social media pages
- Basic Shopify – $29 per month + 2.9% and 30¢ per transaction
- Shopify – $79 per month + 2.6% and 30¢ per transaction
- Advanced Shopify – $299 per month + 2.4% and 30¢ per transaction
- Shopify Plus – pricing available via quote.
👉 Read our Shopify pricing guide for more info.
The image below shows some of the features of Basic Shopify, Shopify, and Advanced Shopify.
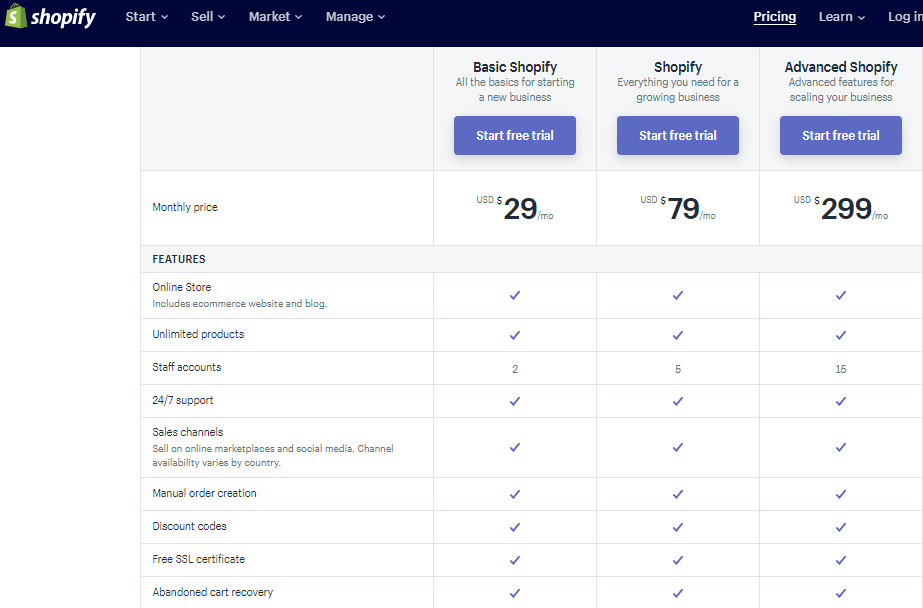
Unlike the Shopify and Advanced Shopify pricing plans, Basic Shopify doesn't offer gift cards and professional reports features. Meanwhile, of the three accounts, the Advanced Shopify is the only one that offers the advanced report builder and third-party calculated shipping rates.
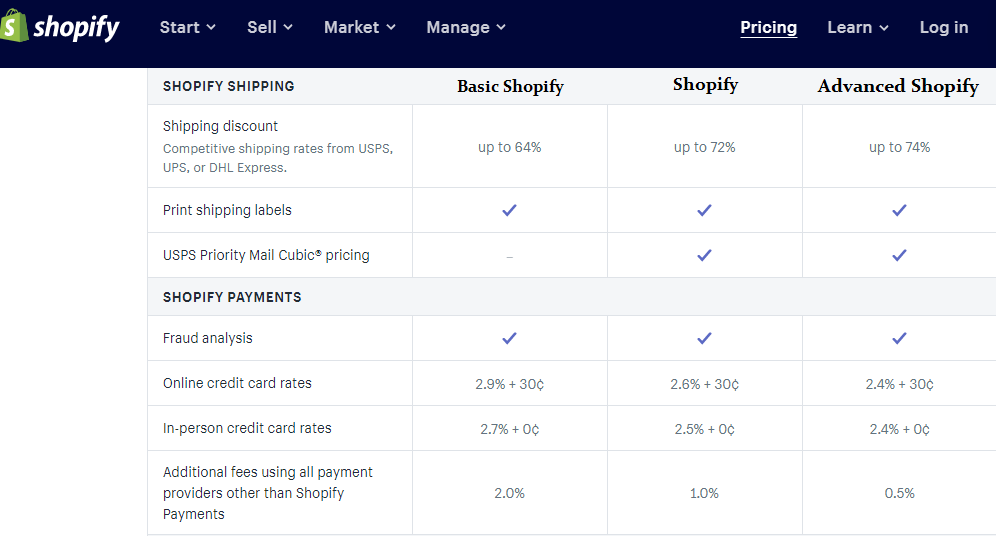
The pricing plans give you a varying percentage of discounts as well as credit rates and additional fees, as shown below. Albeit, you can’t have USPS priority mail cubic pricing with Basic Shopify.
Let’s discuss these plans.
Shopify Lite

Shopify Lite is the cheapest plan at $9 a month. Albeit, this plan doesn’t allow you to create an online store. You can only sell through a “Buy” button or a Facebook plugin on a website or Facebook page.
With a Shopify Lite account, when you upload your catalog on Shopify, you can integrate it with the website or Facebook page. You can provide tracking numbers and shipping updates through Facebook Messenger if you’re selling through a Facebook page.
👉 Read our Shopify Lite Review.
Basic Shopify
This plan starts at $29 per month and offers you all the basic features that help you start an online business. You can add two staff accounts, upload as many products as you want, apply discount codes, and use Shopify shipping.
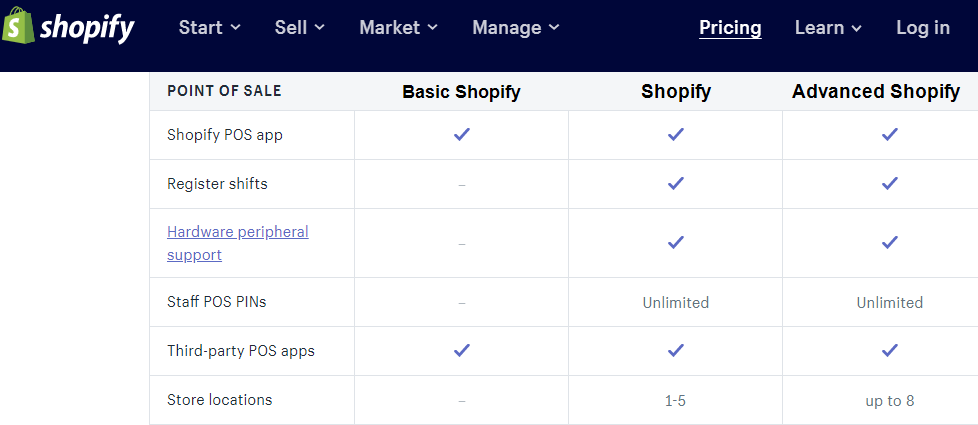
However, for Point of Sale, you can only access the Shopify POS app and third-party POS apps.
On this plan, Shopify would charge a 2.9 percent + $0.30 fee on all online purchases done on credit cards and an in-person credit card rate of 2.7 percent. Also, if you use a payment service provider outside Shopify Payments, that’s an additional two percent fee.
Shopify
At $79 a month, this plan gives all you need for a growing business. So, you have all the benefits of the Basic plan and more. You can add five staff accounts, receive gift cards, and get professional business performance reports.
This plan has more POS offers than the Basic plan. You’ll have POS hardware such as:
- Barcode scanners
- Shipping label printers
- Unlimited POS staff PINs
- Third-party POS apps integrations
- Receipt printers, and
- Cash drawers
On this plan, Shopify would charge a 2.6 percent + 0.30c fee on all online purchases done on credit cards and an in-person credit card rate of 2.5 percent. Also, if you use a payment service provider outside Shopify payments, that’s an additional one percent fee.
Advanced Shopify
If your business is growing very fast and you need more hands for your high transaction size, then Advanced Shopify is the plan for you. At $299 per month, you’ll receive all the benefits of the “Shopify” plan and more.
Some of the additional benefits that this plan has over Basic and Shopify are:
- The opportunity to employ 15 staff
- Advanced report builder
- Third-party shipping rates that you can show customers at checkout

This plan also comes with reduced fees. For online purchases, you’ll pay 2.4 percent + $0.30 and 2.4 percent for in-person purchases. Plus, you only get to pay 0.5 percent for using payment providers outside those of Shopify.
Shopify Plus
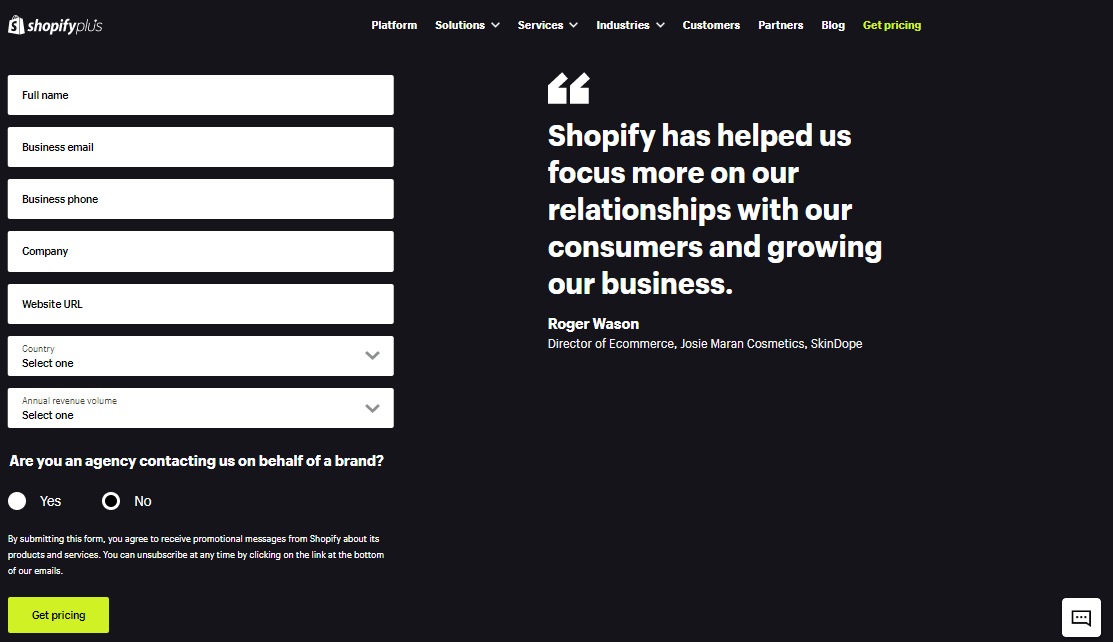
If you’re a high-volume merchant, then the above plans may not meet your needs. Shopify Plus offers personalized assistance and a customizable e-commerce plan that aligns with your business needs. Your part is to fill the form correctly and get a quote.
👉 Read our Shopify Plus review.
What is Shopify Payments?
If you’re thinking about using Shopify to launch your eCommerce business, there are a few things to think about from a financial perspective. First, you need to choose the right Shopify pricing package for your needs. The advice above will help with that.
Next, you’ll need to think about any premium add-ons you might need to sell things like digital products and memberships or unlock Shopify reporting for your Facebook ads. One other concept worth exploring, is Shopify payments.
Shopify Payments is one of the easier ways for business owners to accept payments online. You don’t need to worry about adding a third-party payment provider to your product page and other sales channels. There’s no need for any merchant account either. All you need to do is enter the right credentials into Shopify, and you’ll be able to accept all payment methods via Shopify.
Shopify Payments essentially cuts the middleman out of your payment processes. Instead of having to find a third-party provider, you get access to everything you need in one place. Plus, Shopify Payments removes the transaction fees from your digital storefront.
Is Shopify Payments Worth It?
With Shopify payments, you can access all of the tools for your eCommerce site on one dashboard. That makes it easier to track your funds, and your store. Plus, you can use other payment providers alongside Shopify payments, so there’s still the option to offer customers things like PayPal.
One issue with Shopify Payments is that it’s not available in every country right now. Plus, you need to make sure that your company complies with Shopify terms and conditions. Another possible issue is that Shopify does charge you $15 every time you get a chargeback.
On the plus side, you can activate Shopify payments for free, and you cut out the costs of transactions, which can be pretty pricey after a while. If you’re a Shopify user, you just need to hand over a few details on your Shopify backend. Log into your Shopify account click on Payment providers in Settings and click Complete Shopify Payments setup.
Aside from being easy to use, another benefit of Shopify payments is that you can track your cash in real time. Within your Shopify dashboard, you can track your funds, and make sure you’re not missing any money. Usually, it’ll take around 3 days for money to reach your account.
What is Shopify POS (Point of Sale)?

Shopify Payments is a handy tool for today’s online business owners. However, it’s worth noting that Shopify isn’t just there for people who want to sell digital products and physical items over the web. The Shopify experts also support offline selling too.
If you have a brick and mortar store alongside your Shopify domain name and eBay account, then you can upgrade your payment processing strategy with Shopify POS. The Shopify point of sale system works alongside your eCommerce strategy, so you can strengthen your presence online and offline. What makes Shopify POS even better is the fact that the initial version (previously Lite) version is included as standard with every Shopify plan.
Shopify POS offers access to various hardware and mobile accessories for taking payments in stores and pop-up shops. In-person credit card transaction rates start at just 1.5% plus 0 cents. There’s also the option to upgrade to Shopify POS Pro. This is a better choice for companies with serious offline stores, as it comes with a huge number of extra features.
At the time of writing, Shopify POS Pro is available for free until the 31st of October 2020. This is part of Shopify’s effort to support companies during the COVID-19 pandemic. Outside of this free period, Shopify POS Pro will cost $89 per month for each location.
What’s the Difference Between Shopify POS and Shopify POS Pro?

If you’re setting up your Shopify payment gateway and offline store system, then you’ll need to decide which version of Shopify POS is right for you. Generally, Shopify POS (previously POS Lite) is best for smaller companies with occasional pop-up stores. Shopify POS Pro is well-suited to companies that sell frequently offline and need plenty of functionality.
With Shopify POS, you get access to things like email cart abandonment tools, product QR codes, external card terminal support, and partial payments. There’s also features like discounts and gift cards, split tenders, custom payment types, and various payment methods. Other features include:
- Access to Shopify hardware
- Great deals on in-person card rates
- Cash flow management software
- POS hardware and software
- Free shipping and returns
- Global search
- Custom checkout
- Tax management support
As a free add-on for any Shopify package, Shopify POS is very generous. However, the POS Pro service does take your functionality to the next level. This is the option intended for people who frequently sell offline and need access to things like shipping support and pick-up-in-store services. For your extra cost, you get everything included with basic Shopify POS, as well as:
- Stock reports and low stock notifications
- Demand forecasting and analytics
- Sales and cash tracking reports
- Inventory management
- Sale item suggestions
- Purchase orders and inventory tracking
- Unlimited staff accounts
- Save/retrieve cart functionality
- Custom receipts
What is Shopify Shipping

So, we’ve covered Shopify payments, and Shopify POS for offline selling. How else does Shopify set itself apart from other site builders, like WordPress? Well, you might know that the tool comes with access to things like integrations for your marketing campaigns and google analytics. However, did you know that Shopify also supports your shipping practices too?
One great way to improve your reputation online is to build an online blog and optimize your site to appear on the search engine results. Another option is to ensure you’re giving your customers the best experience with your store. Shopify shipping is a built-in shipping solution for your Shopify shopping cart.
With this functionality, you can calculate real-time shipping rates for your customers, print branded shipping labels, and track your shipments. Currently, Shipping is free for users on every Shopify plan, provided you’re located in Canada or the United States.
Shopify partners with companies like DHL Express and USPS to provide excellent discount rates on your shipping. With real-time quotes for shipping, you can also give your audience a better, more accurate cost before they finish the checkout process.
Is Shopify Shipping Worth It?
Like many eCommerce tools, Shopify Shipping has it’s pros and cons. It’s free to use, and an excellent way to get discounts on a range of shipping processes. However, access to FedEx shipping isn’t available. Additionally, you can only batch print up to 20 labels at a time.
However, even with a handful of downsides to consider, it’s hard not to appreciate Shopify shipping as a free-to-use tool. There are no per-label or monthly fees to worry about. On the other hand, many alternative shipping apps can cost quite a lot. Shopify shipping is also a cost-effective way to get a discount on any of the fulfilment processes you need to handle for your customers.
Shopify Shipping is a good idea if:
- You want deals with major carriers: If you’re shipping physical products to customers, then deals on your fulfilment process are always a good idea. Shopify Shipping supports orders through DHL, UPS, USPS, and Canada post.
- You need peace of mind: If you’re selling products in the United States, you can also buy shipping insurance for peace of mind. Insurance gives you up to $5,000 of coverage on eligible shipments.
- You want Batch printing: You can only print up to 20 labels at a time with Shopify Shipping. However, that’s still a lot better than having to print your labels one by one.
- You’re looking for Various shipping options: Shopify Shipping gives you complete control over your order fulfilment. You can set flat shipping rates or calculate rates according to dimensions or weight. There’s also the option to add shipping calculations to checkouts.
- You need to provide great service: Offering customers amazing service is one of the best ways to continue making a profit. With Shopify shipping, you get access to real-time tracking information and order updates. This means it’s much easier to track down important information for your clients.
- International support: You can print customs forms with your shipping labels if you’re shipping worldwide. There’s also an address checker system too. This means that Shopify automatically informs you if the address you enter doesn’t seem to be correct, or properly formatted.
Notably, when you’re deciding whether to invest in Shopify shipping, it’s worth noting that the service doesn’t support all product types. For instance, you can send most basic packages with this feature, but you can’t send a flat letter or envelope.
There’s also no support for particularly larger packages. Anything with a total combination of length, width, and height that reaches more than 84 inches is too big. One other point to note is that you may need to place your items in a box. Irregular packages aren’t suitable for Shopify shipping.
The Step-by-Step Guide: How to Sell on Shopify
You don't have to be a tech guru to start selling on Shopify because the platform is super easy to work with.
Following the simple steps below, start selling on Shopify.
Step #1: Name Your Store
Regardless of how far you want to go in your business, it all begins with a simple reregistration.
Deciding which Shopify plan best suits your business needs is the first decision you must face on how to sell on Shopify. Albeit, you can start with the 14-day free trial and decide at the end. In that way, you can see first hand what you're paying for.
If trying it out is your option, then you don’t need a credit card for a successful sign-up. You’ll have your account ready in seconds. Just go to shopify.com and click on “start free trial.”
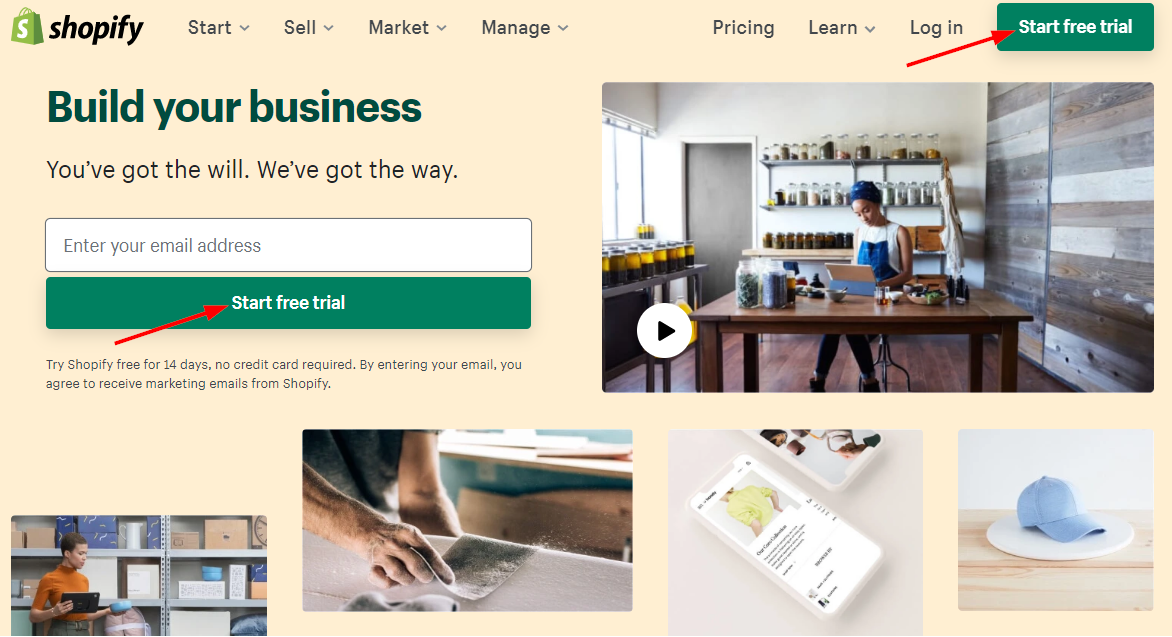
It'll take you to a form that requires you to fill your email address, password, and store name.

Fill the form and click “Create your store.”
No two businesses have the same store name on Shopify. So, don't worry when you get an error message like this:
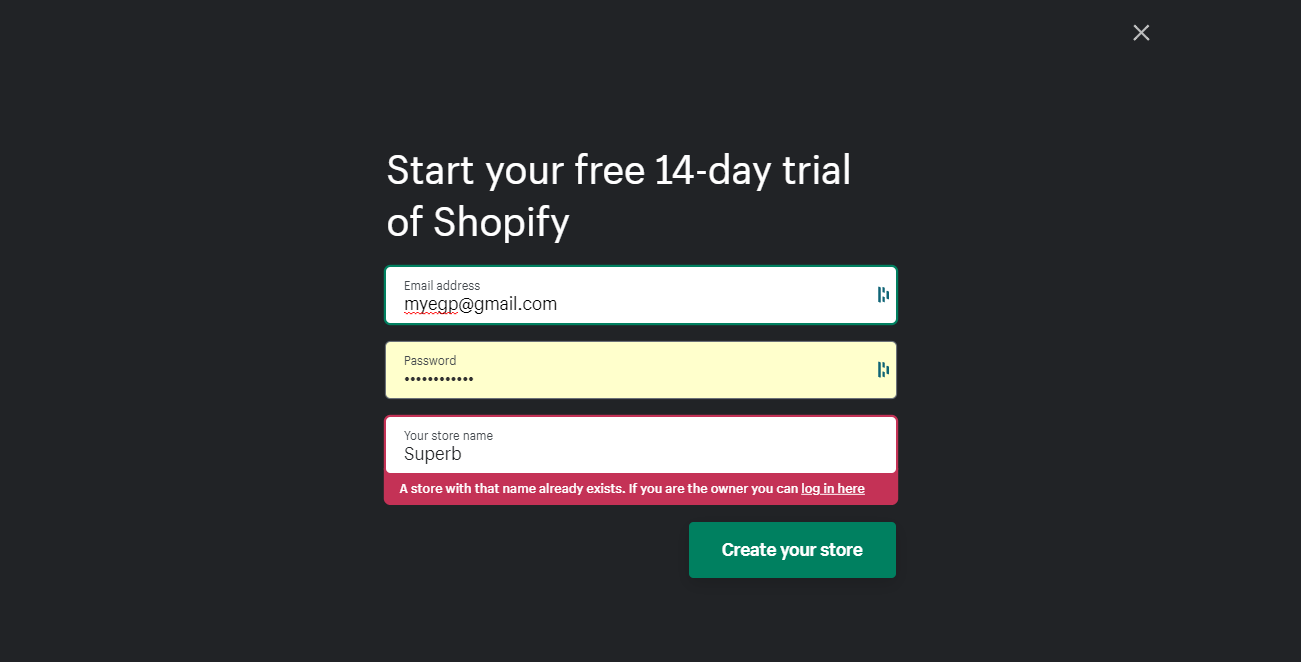
Just choose another name for your store and change it later for something you love.

The next form you'll see would ask you if you already sell on Shopify, your current revenue, and if you're doing it for someone else.
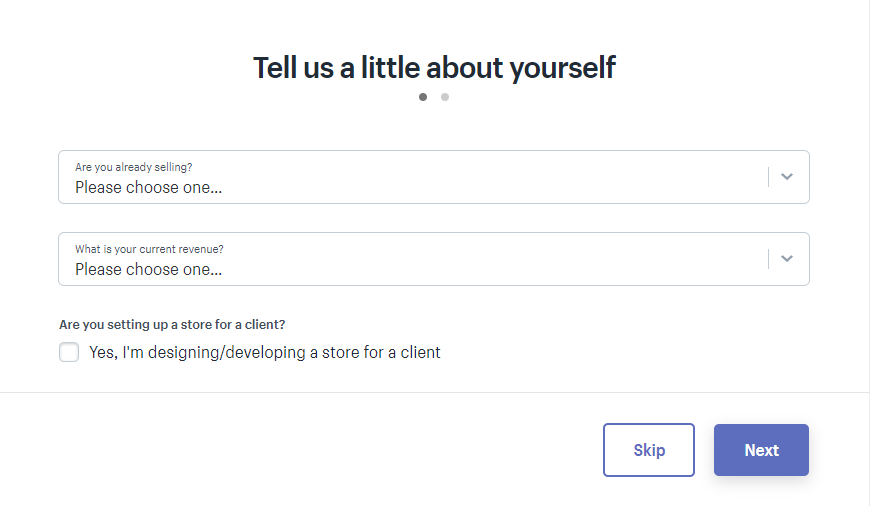
The first two questions would branch out to other questions. Answer them truthfully to help Shopify show you the right course to follow. Albeit, if for any reason you'd rather skip this step, that option is also available.
Whatever you choose, the next form would ask you to add your default business address for payments.
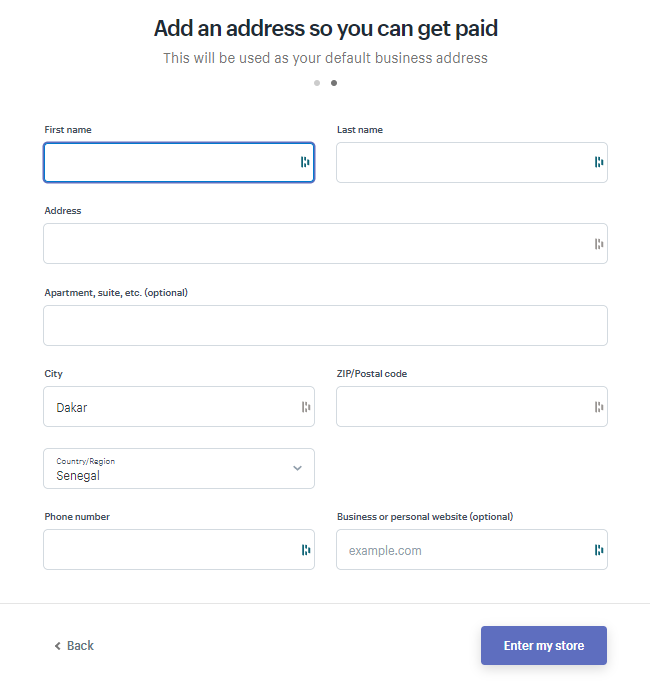
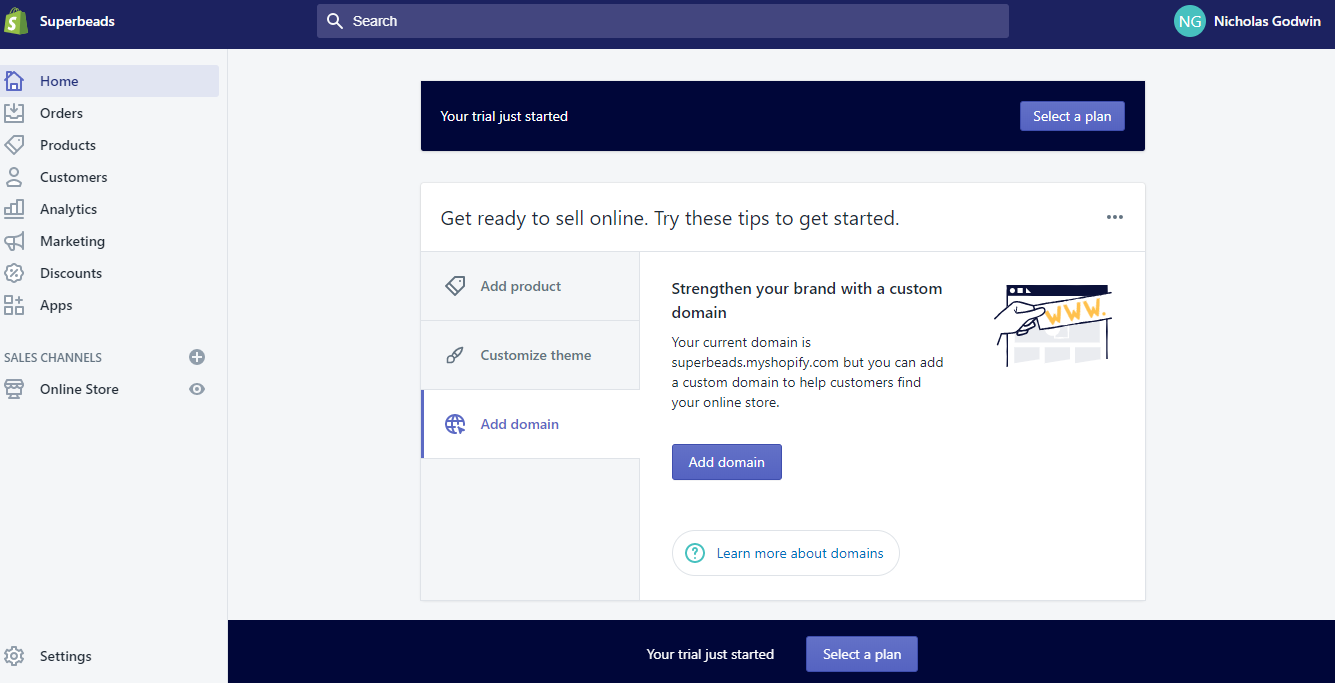
Once this process is successful, you'll get to the admin panel. Congratulations! You’re now a proud owner of a Shopify account.
You can add physical products, services, media, or anything that helps you sell.

We’ll explore how to upload products in detail in Step #3.
The “Customize theme” section allows you to edit your online store’s look and feel. You can add your product slideshow, logo, and use the colors you like.

In step #2, we’ll go deeper into how to use this feature.
If you’ve gotten this far, that means you already have a domain with Shopify. Albeit, if you want to strengthen your brand, you can use the “Add domain” option to add a custom domain. It also makes it easy for your customers to find your store.
After 14 days, you'll have to reactivate your account with a paid plan as Shopify would cancel your account at the end of the trial period.
Step #2: How to Choose the Perfect Shopify Theme
Not judging a book by its cover is easier said than done. Your theme has the power to attract or put off your potential customers. So you want a professional theme that's highly functional and engaging.
To work with themes on Shopify, go to your admin panel and click Online Store. On the dropdown, select themes.

When you scroll down a little, you’ll find links to access paid and free themes. Shopify gives you an array of over 70 themes, eight free and 64 premium themes, so you have more than enough options.

While saving money is good for business, Shopify’s paid (premium) themes give you more access to features and functions that make your store unique. All Shopify theme templates come with theme settings that allow you to customize your store design without HTML or CSS.
You can customize your Shopify theme with the theme’s customization options. Right on the Shopify theme panel, you’ll find the customization button.

The theme customizer is quite intuitive. You can edit theme sections like the typography, colors, favicon, and more. Most themes will have a number of pages so you can edit each page and preview them how they’ll look on mobile, tables, and desktops.

On their home pages, themes would usually have sections like testimonials, videos, feature sliders, and more, which you can edit as well.
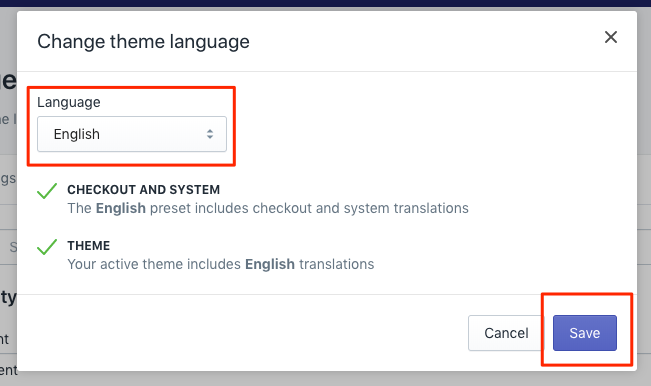
If you’re wondering how to sell on Shopify in a different language, say Thai, Chinese, Dutch, or any of the 30+ languages it offers, the platform got you covered. You can edit your theme’s language. On the theme’s panel, click on Actions and choose Edit languages from the dropdown menu.

Near the top of the page, you’ll find Change theme language. Click on it.

Choose the language you want and then click Save.
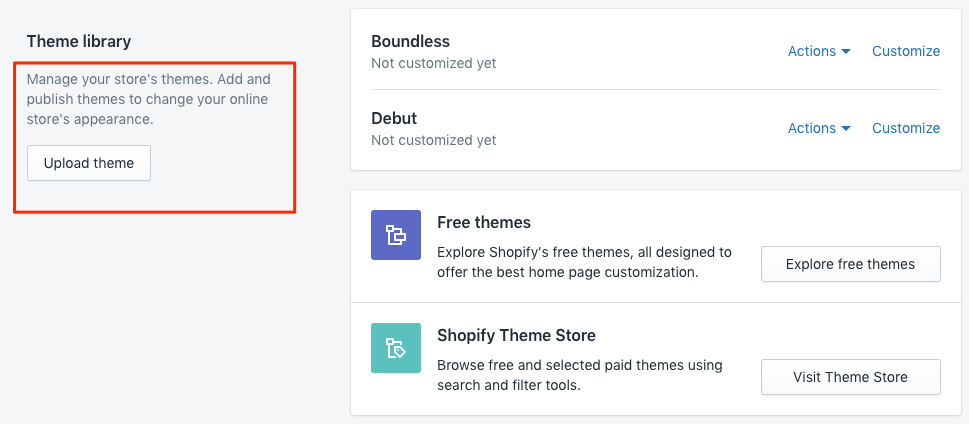
Didn’t find a theme that meets your needs? Shopify provides you with the option to upload a theme. Return to the theme library and click Upload theme.
You can summarize the customization process in three steps,
- Pick a template from Shopify themes
- Customize to taste
- Launch
Improve user experience by previewing your designs on desktop and mobile. Shopify provides a knowledge base to help you through the process too.
Step #3: How to Add Products on Shopify
You can now add products to your beautiful store. This process might take time, but it'll be worth it. The aim here is to optimize for conversion, so pick your products wisely.
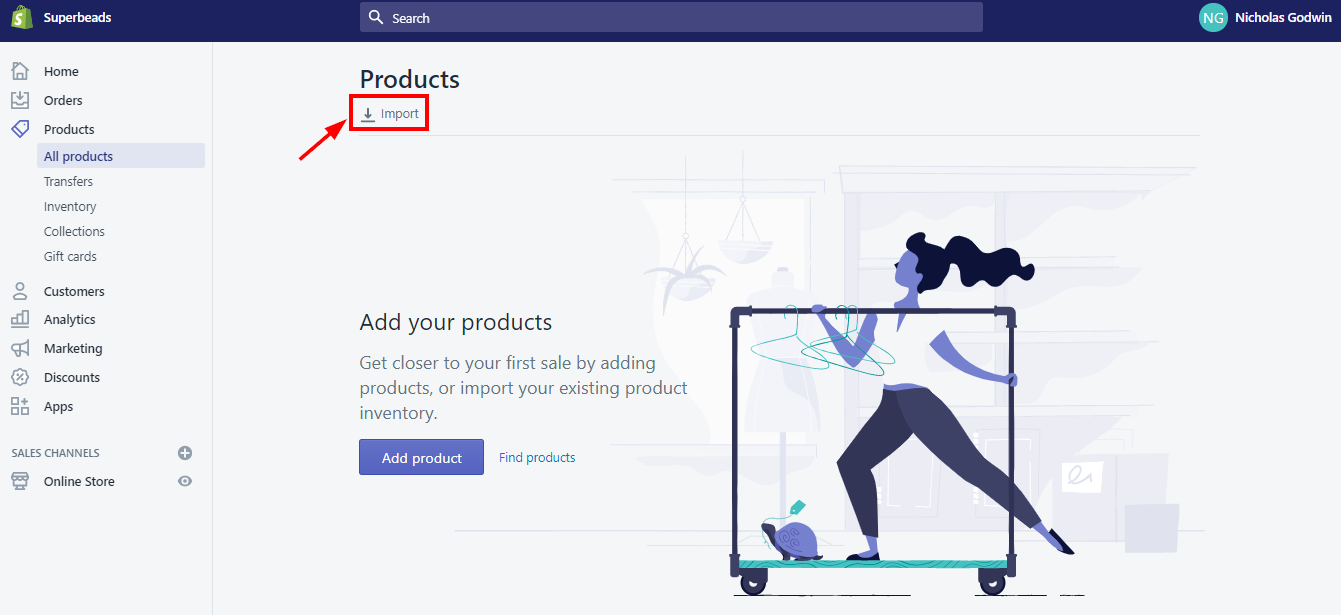
Click on “products” on your Shopify admin panel to manage your inventory.
If you have a large inventory, click “import” to get bulk products from a CSV file.
Click “choose file” to import products from a CSV file.
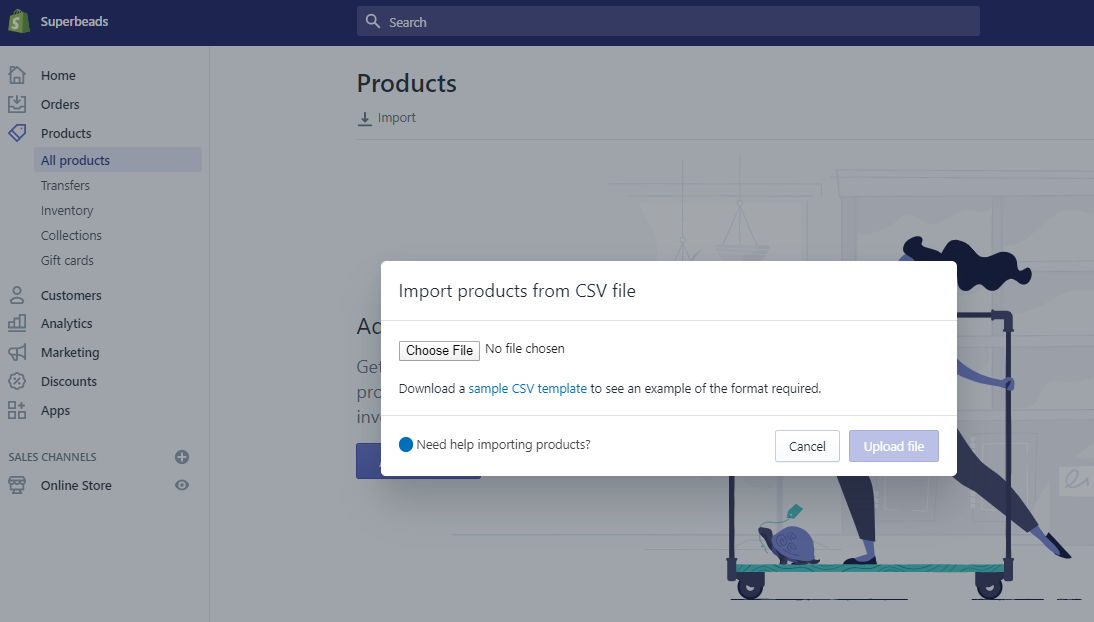
If you don't have a prepared file, you can follow the “sample CSV template” link to download a template. The idea is to have all you want to upload arranged for speed.
However, if you have one to five products, filling product details and uploading images won't be such a big deal. Click on Add product to get started.
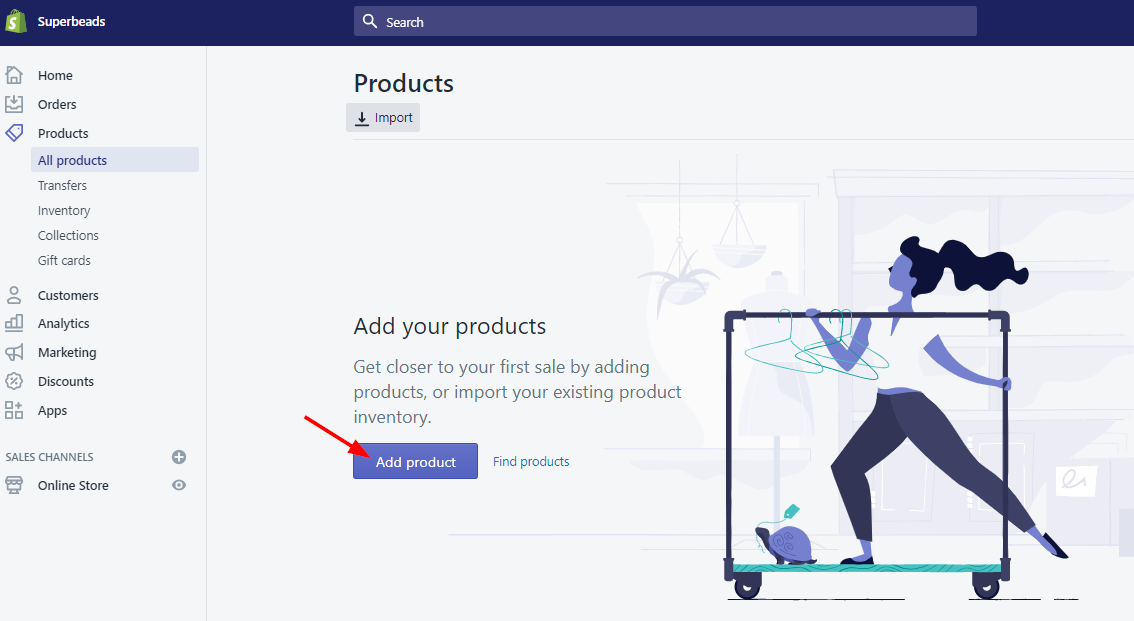
That takes you to the next image to upload details.

Fill the required fields, and you’re done with adding products.
Step #4: Customize and Add Shopify Apps to Your Store
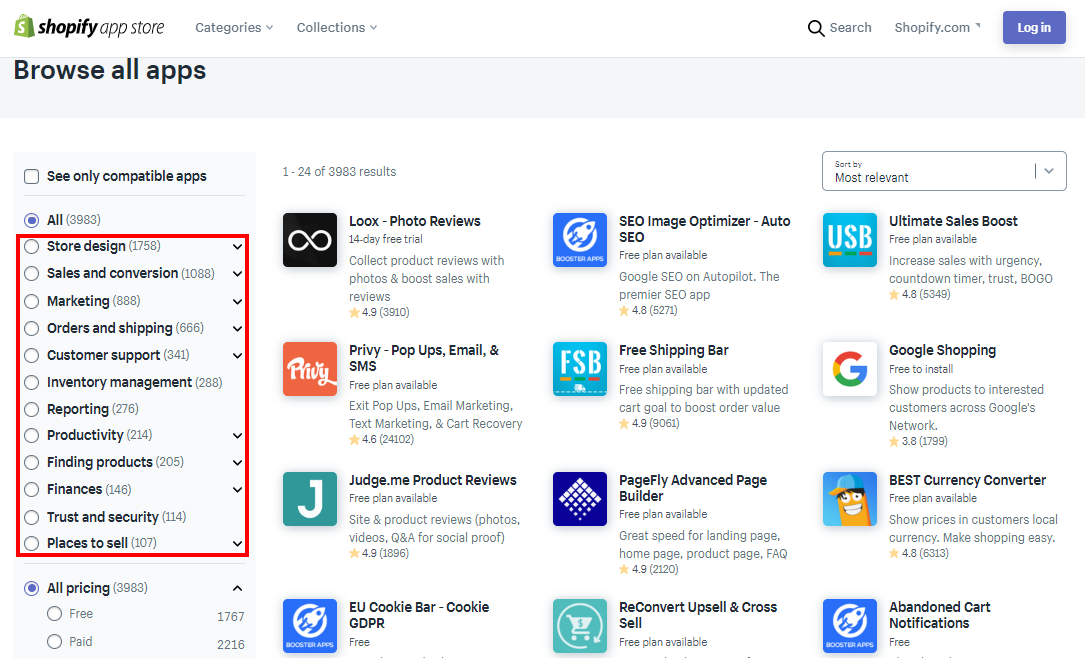
With flexibility and ease of use, Shopify allows you to improve the functionality of your store with apps. Presently, you have access to almost 4,000 apps on the Shopify apps store. And like the themes, you'll get free and paid options.
Shopify categorizes these apps, so you can find what you want faster.
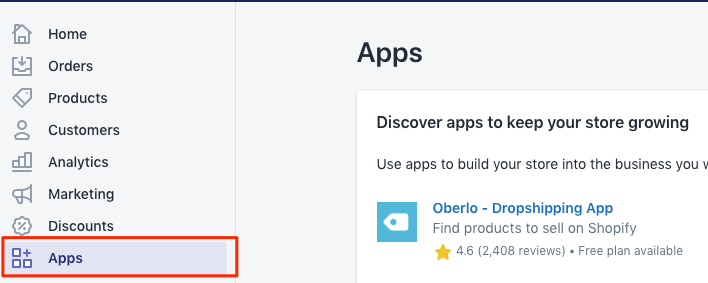
To work with apps, click Apps on your admin panel.

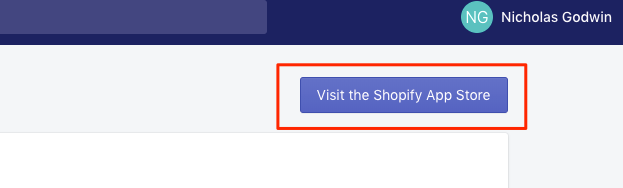
You’ll immediately see apps that you can use to grow your business, but if you need more, click the blue button to take you to the Shopify app store.
However, you can follow the “Manage private apps” link if you’re working with a private developer.

Step #5: Add Shipping Settings
When your customers buy from you, they expect to get what they’ve paid for. So that makes this step inevitable.
Deciding how to manage shipping or dropshipping requires a lot of thoughts. First, you need to decide the shipping methods and rates that would be profitable for your business.
As a Shopify member, based on your subscription plan, you can save money by using Shopify Shipping. It’s a built-in suite that gives you the right as a merchant to:
- Calculate rates with UPS, USPS, Canada Post, and DHL
- Print shipping labels, and more
Here are steps that you can follow.
Steps for Using Shopify Shipping
Some of the steps you follow for successful shipping include:
- Use Shopify Shipping to choose the shipping carriers you want to enable at checkout
- Allow customers to choose shipping service and their preferred speed
- receive customers' order and shipping payments
- Fulfill the order using Shopify and print label and package slips
- Schedule a pickup or drop off packages to the carrier
Shipping Rates
To get started with Shopify Shipping, you must add weight to all your products.
In your product description page, scroll down to where you have “Shipping” and add the weight of your product. You can do that individually or in bulk.

It'll help to add the dimension and weight of the packaging you plan to use for the item for more accurate shipping calculation.
Go to settings on the admin panel.

Click shipping.

Then scroll down to the packages section.

The distance that the package would travel is also important in deciding your shipping rates. Your shipping cost adjusts as your customers adjust their orders.
Step #6: Guide to Setting Up Payments on Shopify
For credit card payment, you can either use Shopify Payments or a third-party payment service provider like Stripe. Just remember the additional fees we talked about in the pricing section of this guide. Other payment methods that are allowed here are:
- PayPal
- Amazon Pay
- Google Wallet
- Apple Pay, or
- Cryptocurrencies
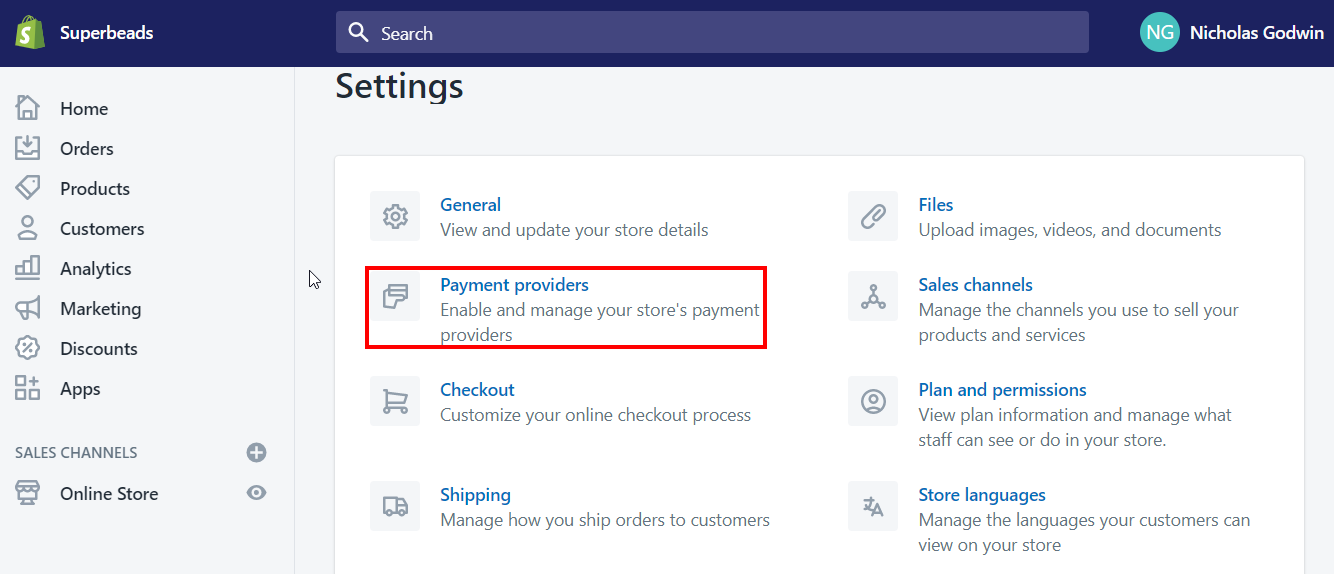
Go to “Settings” on your admin panel and select “Payment providers.”
Follow the instructions to choose payment plans that are available in your country.
Step #7: How to sell on Shopify Using Shopify POS
Before you consider using a Shopify POS, find out if the system is compliant with your country laws.
In this step, you'll learn how to use the Shopify POS. The process involves how to set up the Shopify POS app and update the POS settings at the admin panel.
Here are a few things to set up before you start to use your Shopify POS.
Download and Install the Shopify POS App
Having the Shopify POS app on your device allows you to sell on the go. So, you don’t have to worry if you’re in a fair or a market.
Go to “Apps” on your admin panel and click on the “Visit the Shopify App Store.” button to proceed.

Enter “Shopify POS” into the search box to find the app, and then select the Point of Sale app.
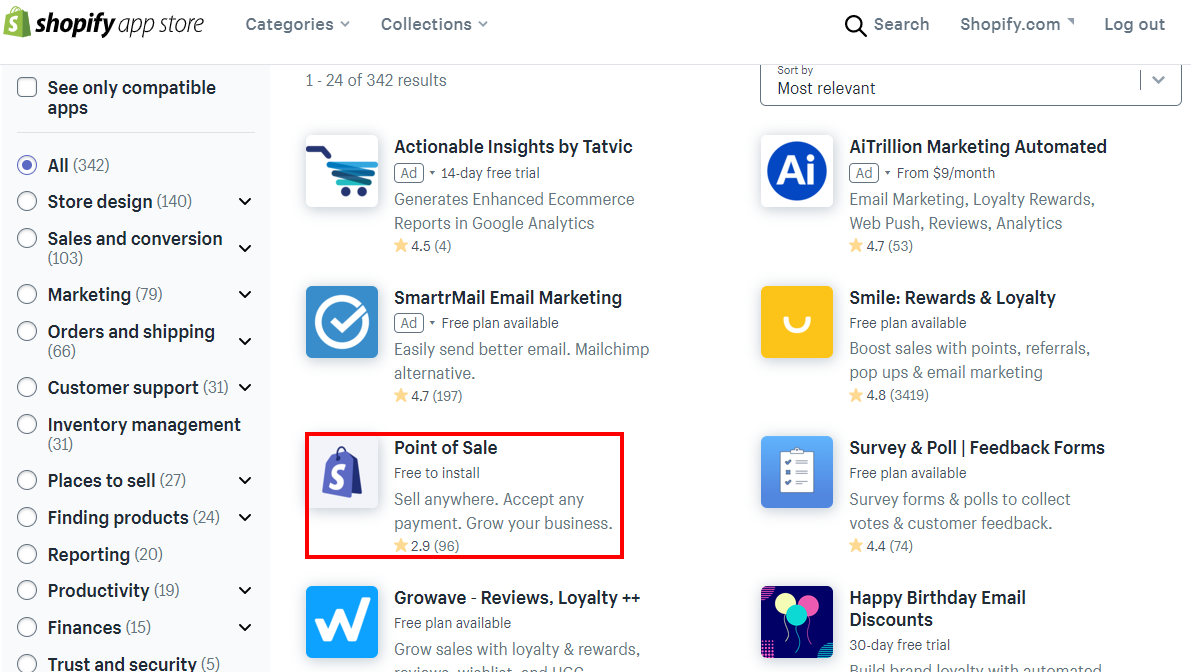
It’ll take you to a page that looks like the image below.

Then click Add app.

You can download it on the App Store or Google Play. Here’s what it looks like on Google Play:

Shopify POS doesn't support iOS 10 anymore, but if you had it before February 2, 2020, you can continue to use it but won't be able to update it. However, you can update your device to iOS 11 to have new features and bug fixes. Or consider using your Shopify POS on another device that runs on iOS 11 or higher
If you haven’t listed your products in your store, then follow step #3 or do it from your Shopify app. It’ll be helpful to upload images to make browsing your products on the POS device easy.
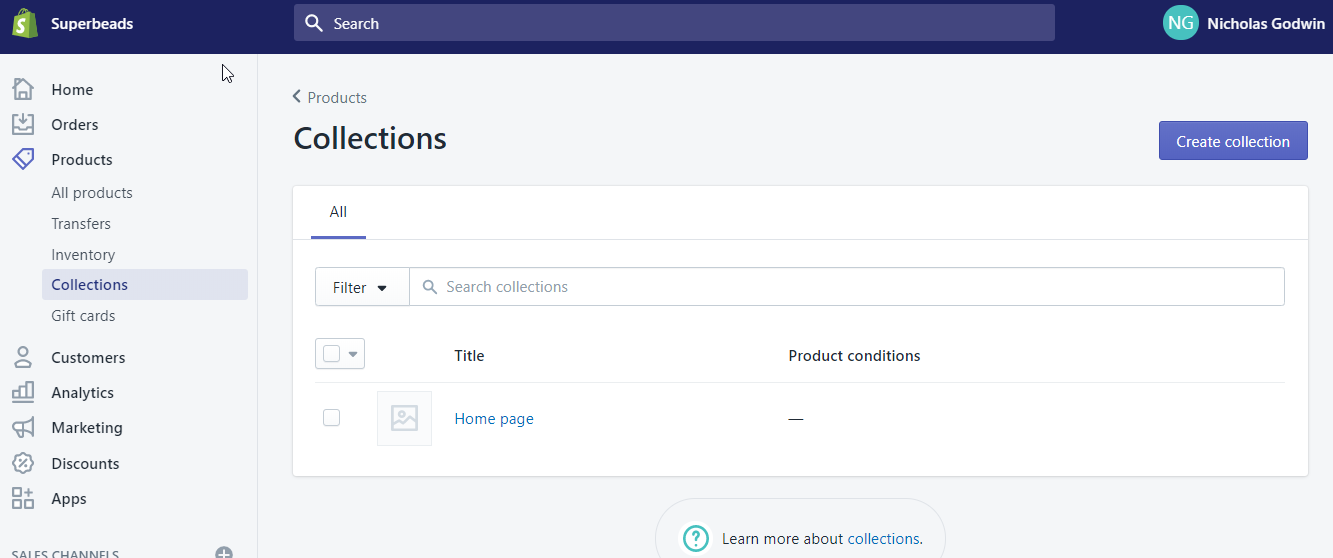
To organize your products, you can create a collection. Go to “Product” and select Collection from the dropdown. The rest is pretty straightforward.
Enable Automatic Order Fulfillment
You can manually mark orders as fulfilled in your admin panel. But why waste so much time changing order status after every purchase if you can make it automatic with the Shopify POS app? Once your customer leaves with their purchase, it marks the order as fulfilled.
On iPad, you click on “store” in the Shopify POS app, then “settings,” and enable “Mark orders as fulfilled.”

It's the same process on an iPhone, except what you see is different.

Here's what it looks like on Android:

Set Staff Permissions
As the store owner, you have full access to the admin panel. Whereas, staff members that you create in the admin can log in to the Shopify POS with their credentials based on your permission.
You want to give each of your staff a personal login account to restrict their interactions with sensitive customer information.
To view or change the permission status of your staff member, go to “Settings,” and click on “plan and permissions.”
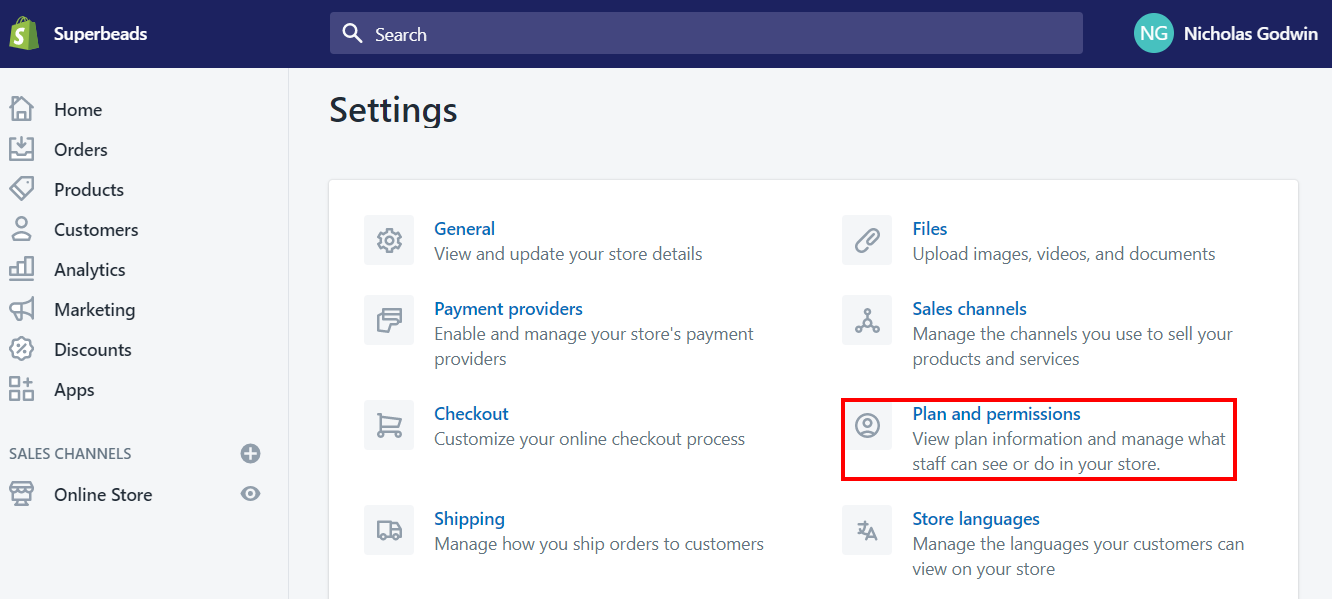
Then scroll down to Permissions. You can then grant permission by clicking Add staff account.

Set Your Device Location
You must remember to set the current location of your Shopify POS device if you use it in more than one address. In that way, you're sure that the taxes on your in-person orders are accurate. Plus, you can track orders that your customers place at each of the physical locations.
However, if the product has a tax override, it'll supersede the location’s rate.
Adding Location
So, to add a store location on desktop, go to “Settings,” then “Location” and “Add location”(or + on iPhone and Android). Remember to save your entry when you're done.

To Edit Location
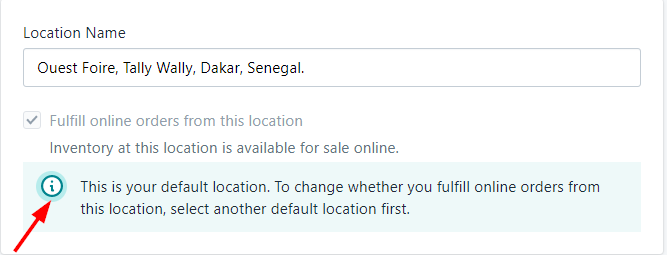
When you want to use your Shopify POS with another address, you can edit the name, address, present location, and phone number. To do this on a desktop, tap Settings, and then Location. Click on the field you want to edit and update the information. Again, save your entry.
However, you can only edit the Added location and not your default location. Shopify would notify you of this and prompt you to change your default location if you try to edit it.
💡 Note: On iOS or Android, the process starts with tapping “Store” in the Shopify app.
Guarantee Payments
You set up payment providers to ensure that customers pay for your product or service. Shopify makes this possible with Shopify Payments and other third-party payment providers that the Shopify POS support. You can find more details about this in step #6
However, only members above Shopify Basic are eligible to use third-party payment options.
POS Receipt
Once you’ve taken payment for an order, you’ll see a display that shows that the payment was successful. This display gives you a few options, as you’ll see below.

Albeit, you have to be on the “Shopify plan,” or higher, in order to have the ability to install a receipt printer. This allows you to print receipts automatically.
Work with Proper POS Hardware
Before you start fussing over what POS hardware to use, find out if your Shopify plan supports it. In that way, you buy what you need only.
With a supported card reader on your iPad or iPhone, you can accept credit card payment with any Shopify monthly plan. But you must be on a Shopify plan that is higher than the Basic plan to add a receipt printer, cash register, and so on.
If you were selling on another platform, you can find out which of your hardware would work well on Shopify. Shopify allows US residents to rent POS hardware.
Step #8: Manage Sales Tax with Shopify
You might need to charge your buyers taxes for your sales. Luckily you can handle some of these tax calculations right on Shopify. You can set region-specific tax rates for buyers from different countries. And you can also set tax override rules.
Here’s how to set up your tax functions on Shopify.
Log in to your store’s admin area, scroll down to the bottom, and click Settings.

Select Taxes from the options you’ll find on display.
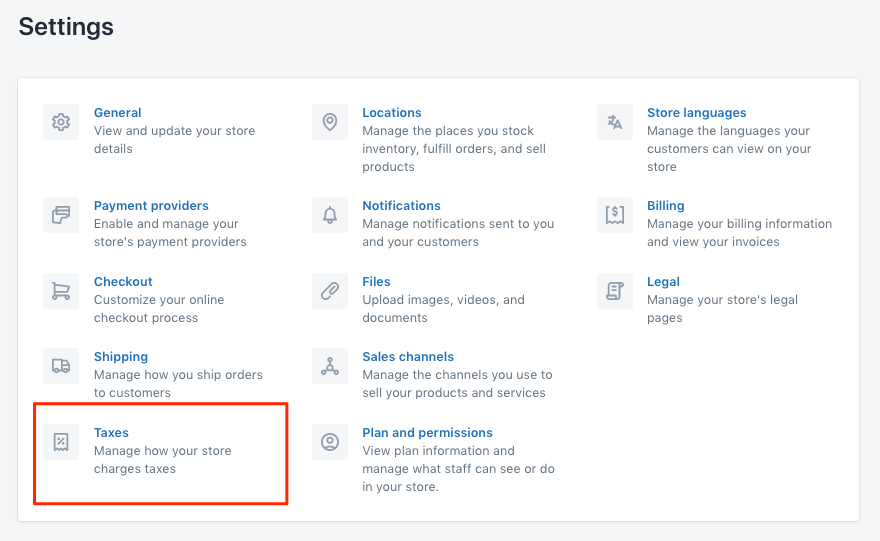
There you can set your store’s tax calculators and manage your tax rates by countries and regions. Shopify also provides a robust knowledge base for merchants to learn more about managing their taxes on Shopify.
Step #9: Define Your Store Policies
You want to define your policies before launching your store. This is critical as it protects your business against legal issues and defines how you intend to serve buyers.
You’ll establish policies for your
- Shipping
- Terms of service
- Refunds
- Customer privacy
- Legal and compliance
These policies appear automatically at the footer of your Shopify store. Here’s how you’ll set your Shopify policies:
In the Home area of your admin dashboard, you’ll find the shipping policy button. Click the “Add shipping policy” button or learn more about how Shopify policies work by clicking the “Learn more” link.
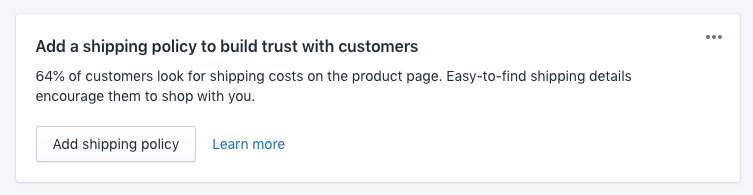
You can set up all the policies in one place by clicking that “Add shipping policy” button.
Step #10: Test Your Shopify Store
Finally, it’s time to test your store before you launch it to buyers. You want everything working as you’d intended them to work. Placing a test order for a product shows you first hand how your store’s
- Checkout works
- Order page looks
- Inventory reacts to the order
- Shipping offer and shipping policies appear
- Tax reporting
Here’s how to place a test order for your product on Shopify:
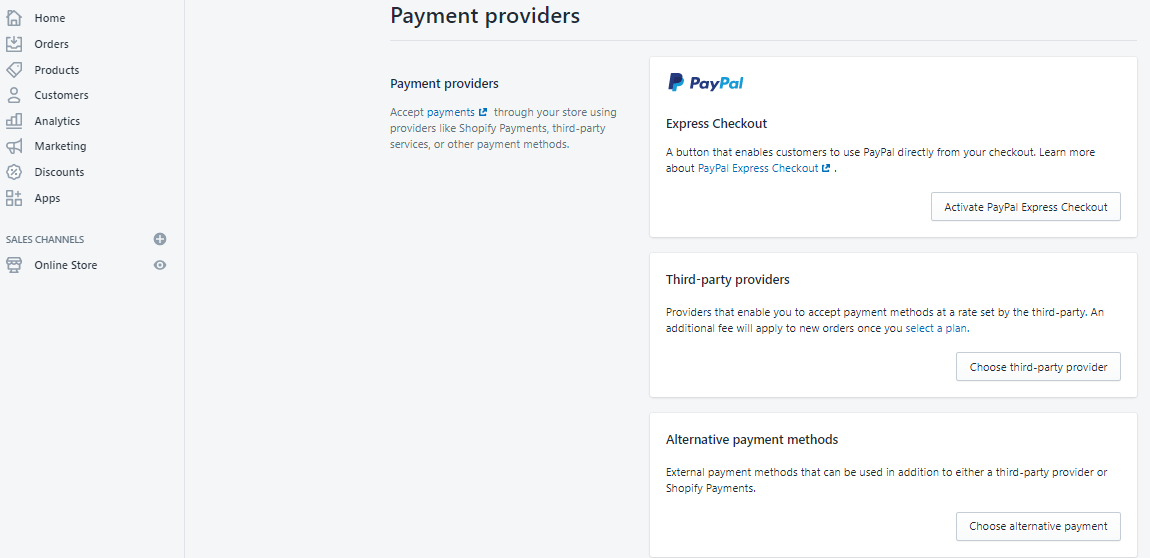
Go to your Shopify admin’s payment provider section. You can access it from Settings.

Click on Manage.

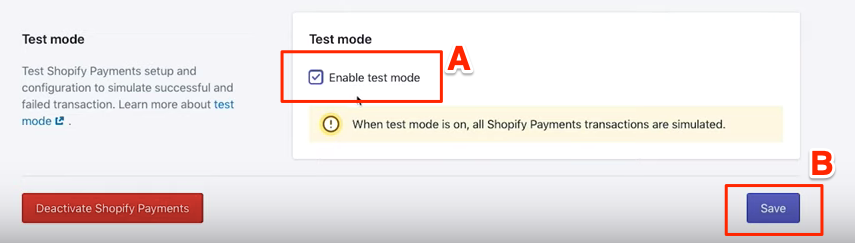
Next, you’ll scroll to the test mode section and check the box Enable test mode. And click Save.
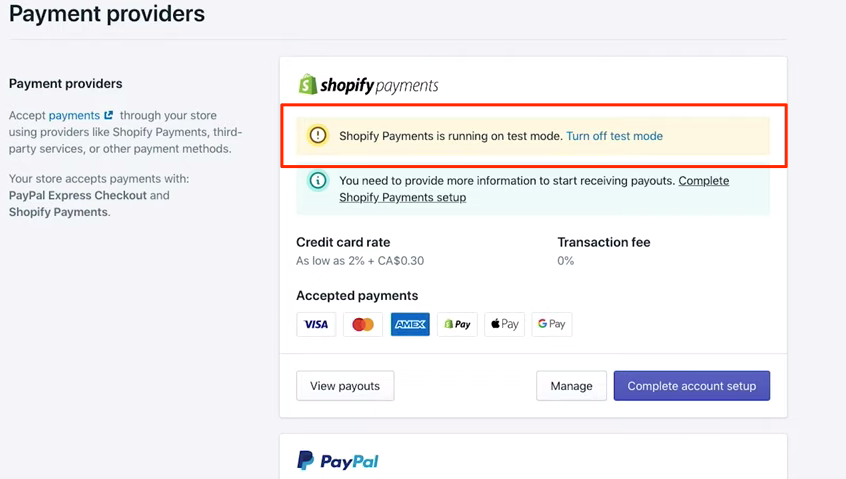
When you click on Payment providers to return to the previous page you should now see a banner confirming that you have switched to test mode.
Go ahead and buy your product. Click on the eye icon next to your Online store to open your store’s home page.

When you buy your product, you won’t be charged for it when you set your account to test mode.
Step #11: Choose a Shopify Plan
If you’re still using Shopify’s 14-day trial at this point, your store would still be passworded, and anyone who finds it must enter a password to access it.
You can choose to remove the free trial anytime by paying for Shopify plans. Once you make the payment, you have opened your Shopify up to buyers. It’s time to promote your business!
Step #12: How to Promote Your Business
So you have it all figured out now.
- You have an attractive Shopify store filled with products you’re excited to sell to your buyers
- Made shipping arrangements for your products or made your life simpler with Oberlo or Printful
- Established all your shipping, refund, and other policies
- Set up your tax calculations and rules
- Tested your store and sure everything is fine
Now is the time to get buyers shopping at your store.
Find Marketing Tools
Like most things with the platform, Shopify offers a ton of opportunities for marketing or promoting your products.
With a simple search, you can find tools to help you attract visitors to your stores. In your Shopify admin area, click on Apps.
Click on the Visit the Shopify App Store button.
Search for marketing tools by entering “Marketing” in the app store search box.

Click the search icon. This will show options for all related apps. Select the Marketing radio button to narrow your options to just marketing apps. If you wish, you can narrow your search even further by selecting any of the specific marketing app categories you’ll see.

For starters, you want to focus on two things. Get visitors to your stores and build an email list. So apps that help you with acquiring visitors include
- Social media marketing
- Content marketing
- Contests and giveaways
- Ads and retargeting
- SEO
Email marketing apps would naturally focus on helping you build your list and nurture them. It’s when you have an audience that you want to dive deep into sales and discounts.
Use Shopify’s Marketing Dashboard and Academy

Although you can implement some sales and discount offers right from the launch, your goal isn’t so much about that in the beginning. You can only sell if you have an audience, right?
Shopify takes this seriously. In your admin area, you’ll find the Marketing section. It provides you with a dashboard that brings everything together, from marketing tools to reporting, campaign monitoring to automation.
You can even take marketing courses at the Shopify Academy.
How to Sell on Shopify – Conclusion
Shopify comes with amazing benefits. The ecommerce platform is
- Easy to use and customize,
- Shopify sites load fast and are SEO optimized,
- It has fantastic customer support,
- The platform allows integrations,
- It’s visually appealing and mobile-friendly,
- Shopify has many useful marketing tools,
Most merchants say that Shopify’s only drawback is the costs that come with owning a store. Apart from stocking your store and the regular monthly fees, sellers pay a charge for credit card payments they receive.
Sellers might also spend money on their shipping, themes, and apps. If you ever need to help with managing your store, then you’ll pay an expert to help you.
However, if you’re running a dropshipping business with Oberlo or Printful, you can save yourself a ton of stress. They help you reduce these costs of stocking products as you’ll never need to buy an inventory to start selling on Shopify. They also handle the order packaging and delivery, which saves you even more time.
👉 Read our Oberlo review here.
👉 Read our Shopify reviews here.
Oberlo helps you source and add products to your Shopify store so that you can start selling instantly. Since it works with multiple suppliers across the globe, you don’t have to do the extra work of negotiating contracts and shipping with suppliers.
Printful designs, prints, and ships t-shirts, hoodies, jackets, throw pillows, mugs, and more for you. You don’t need to carry any inventory, and you can focus on marketing and building your business.
👉 Read our Printful review here.
This is how to sell on Shopify works. It’s time to start selling on Shopify, start the 14-day free trial, and then ease into your s from there.


Thanks for such an informative guide. It’s a very Useful and well-written article.
You’re welcome Andy!